APSI riding concept: how to deal with Australian variable snow conditions

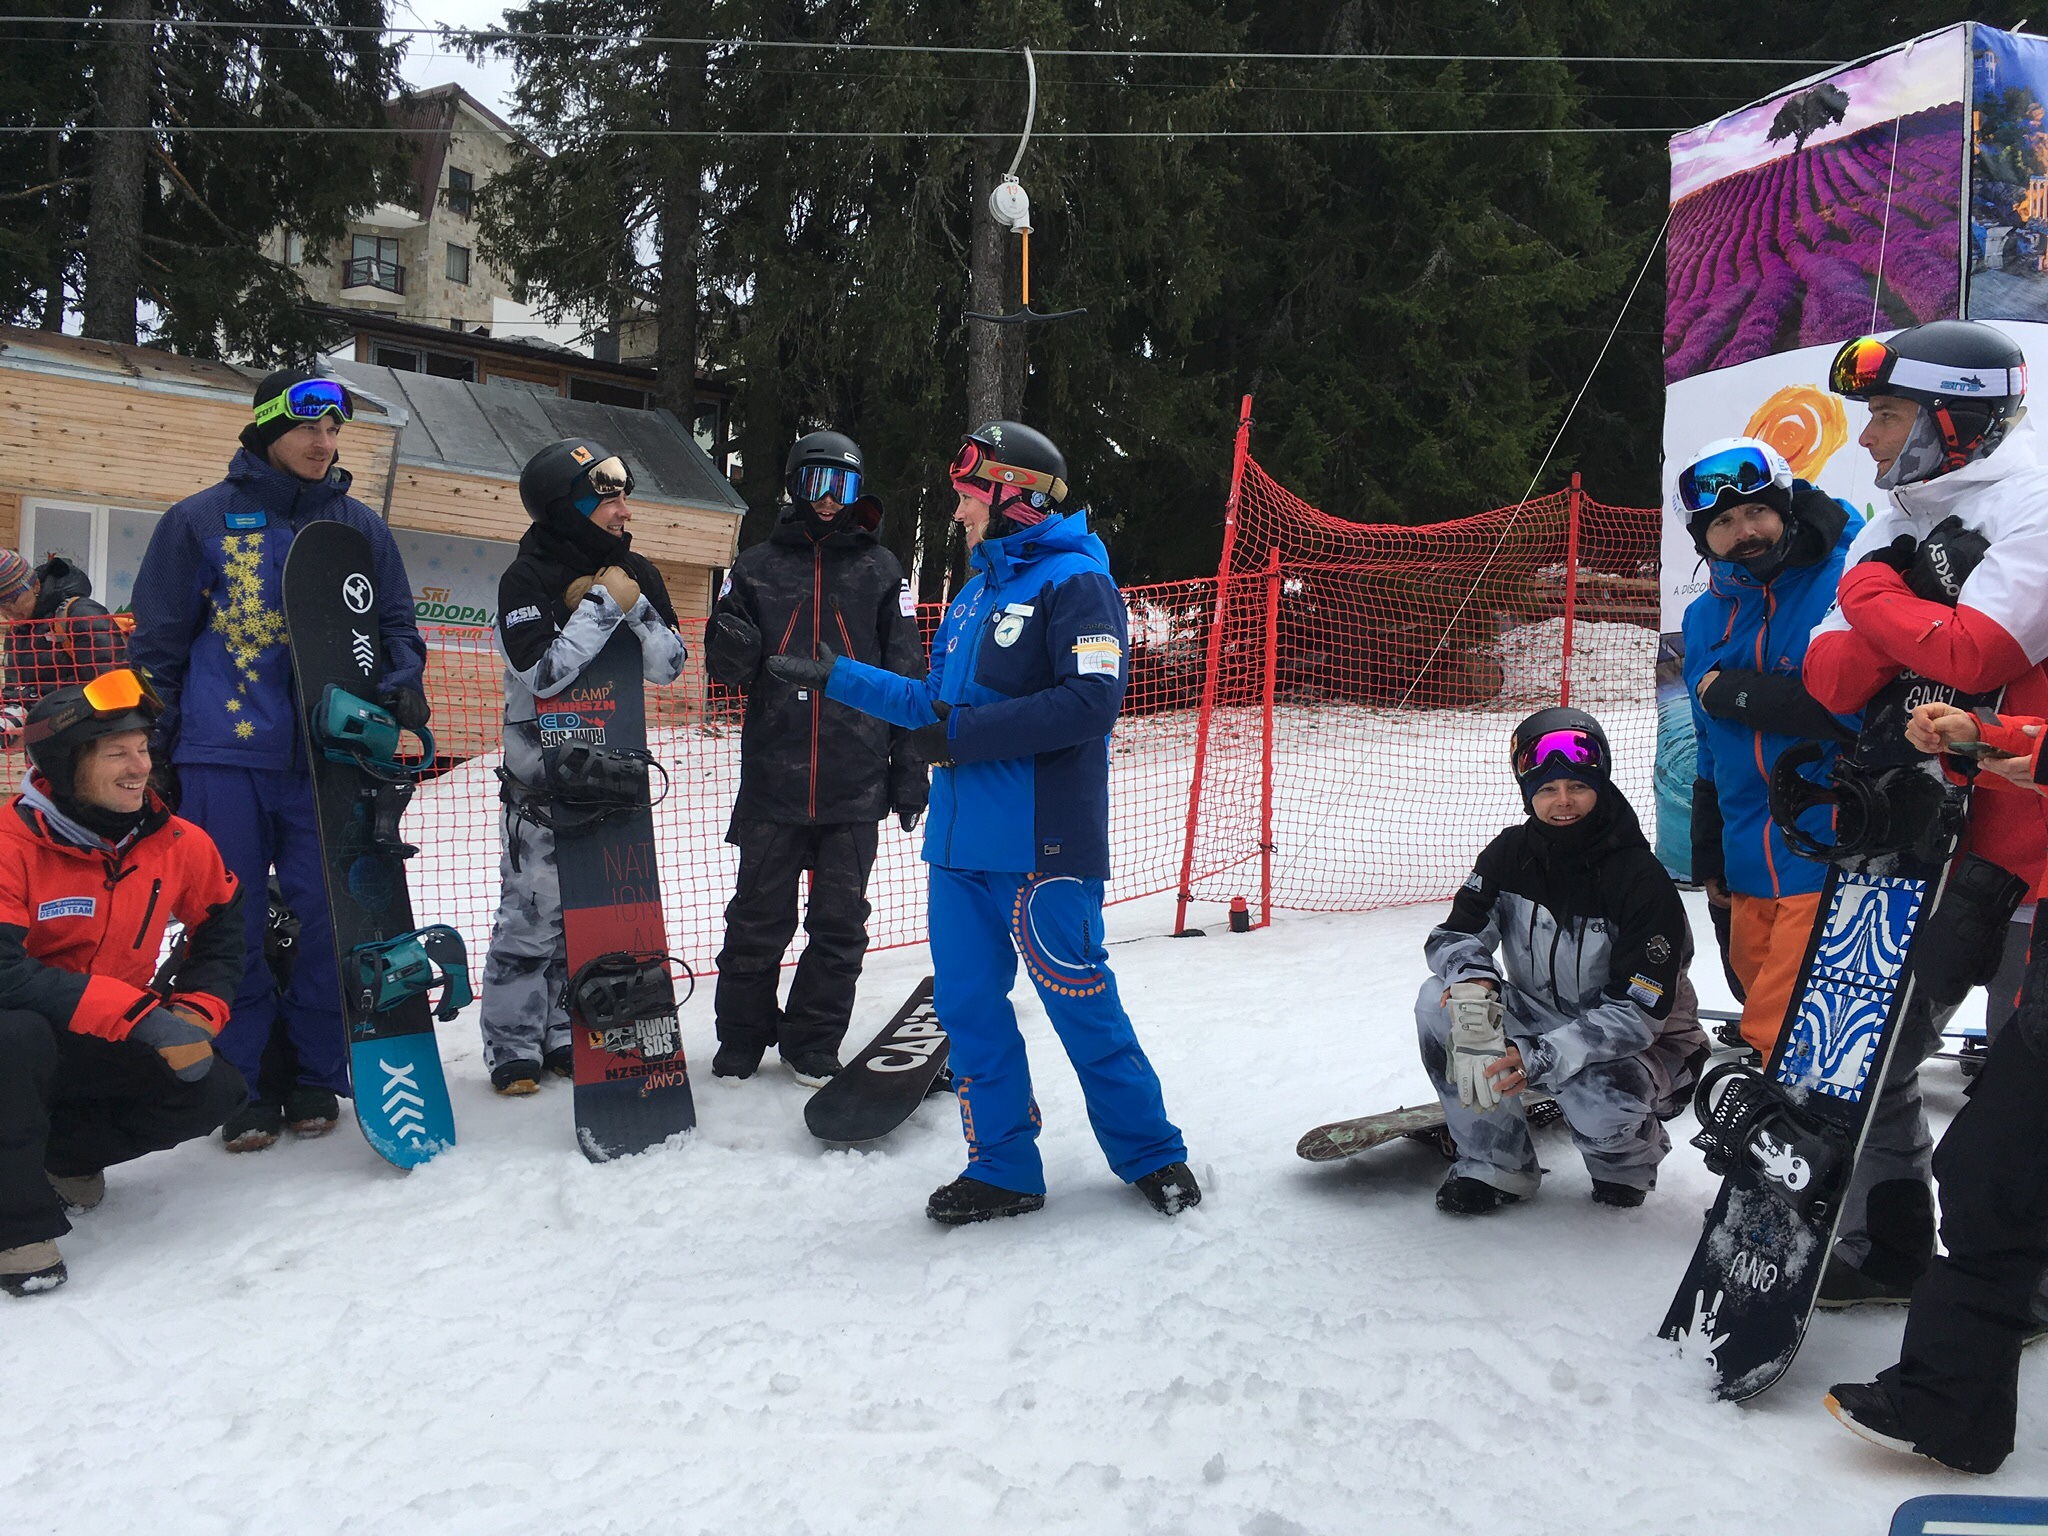
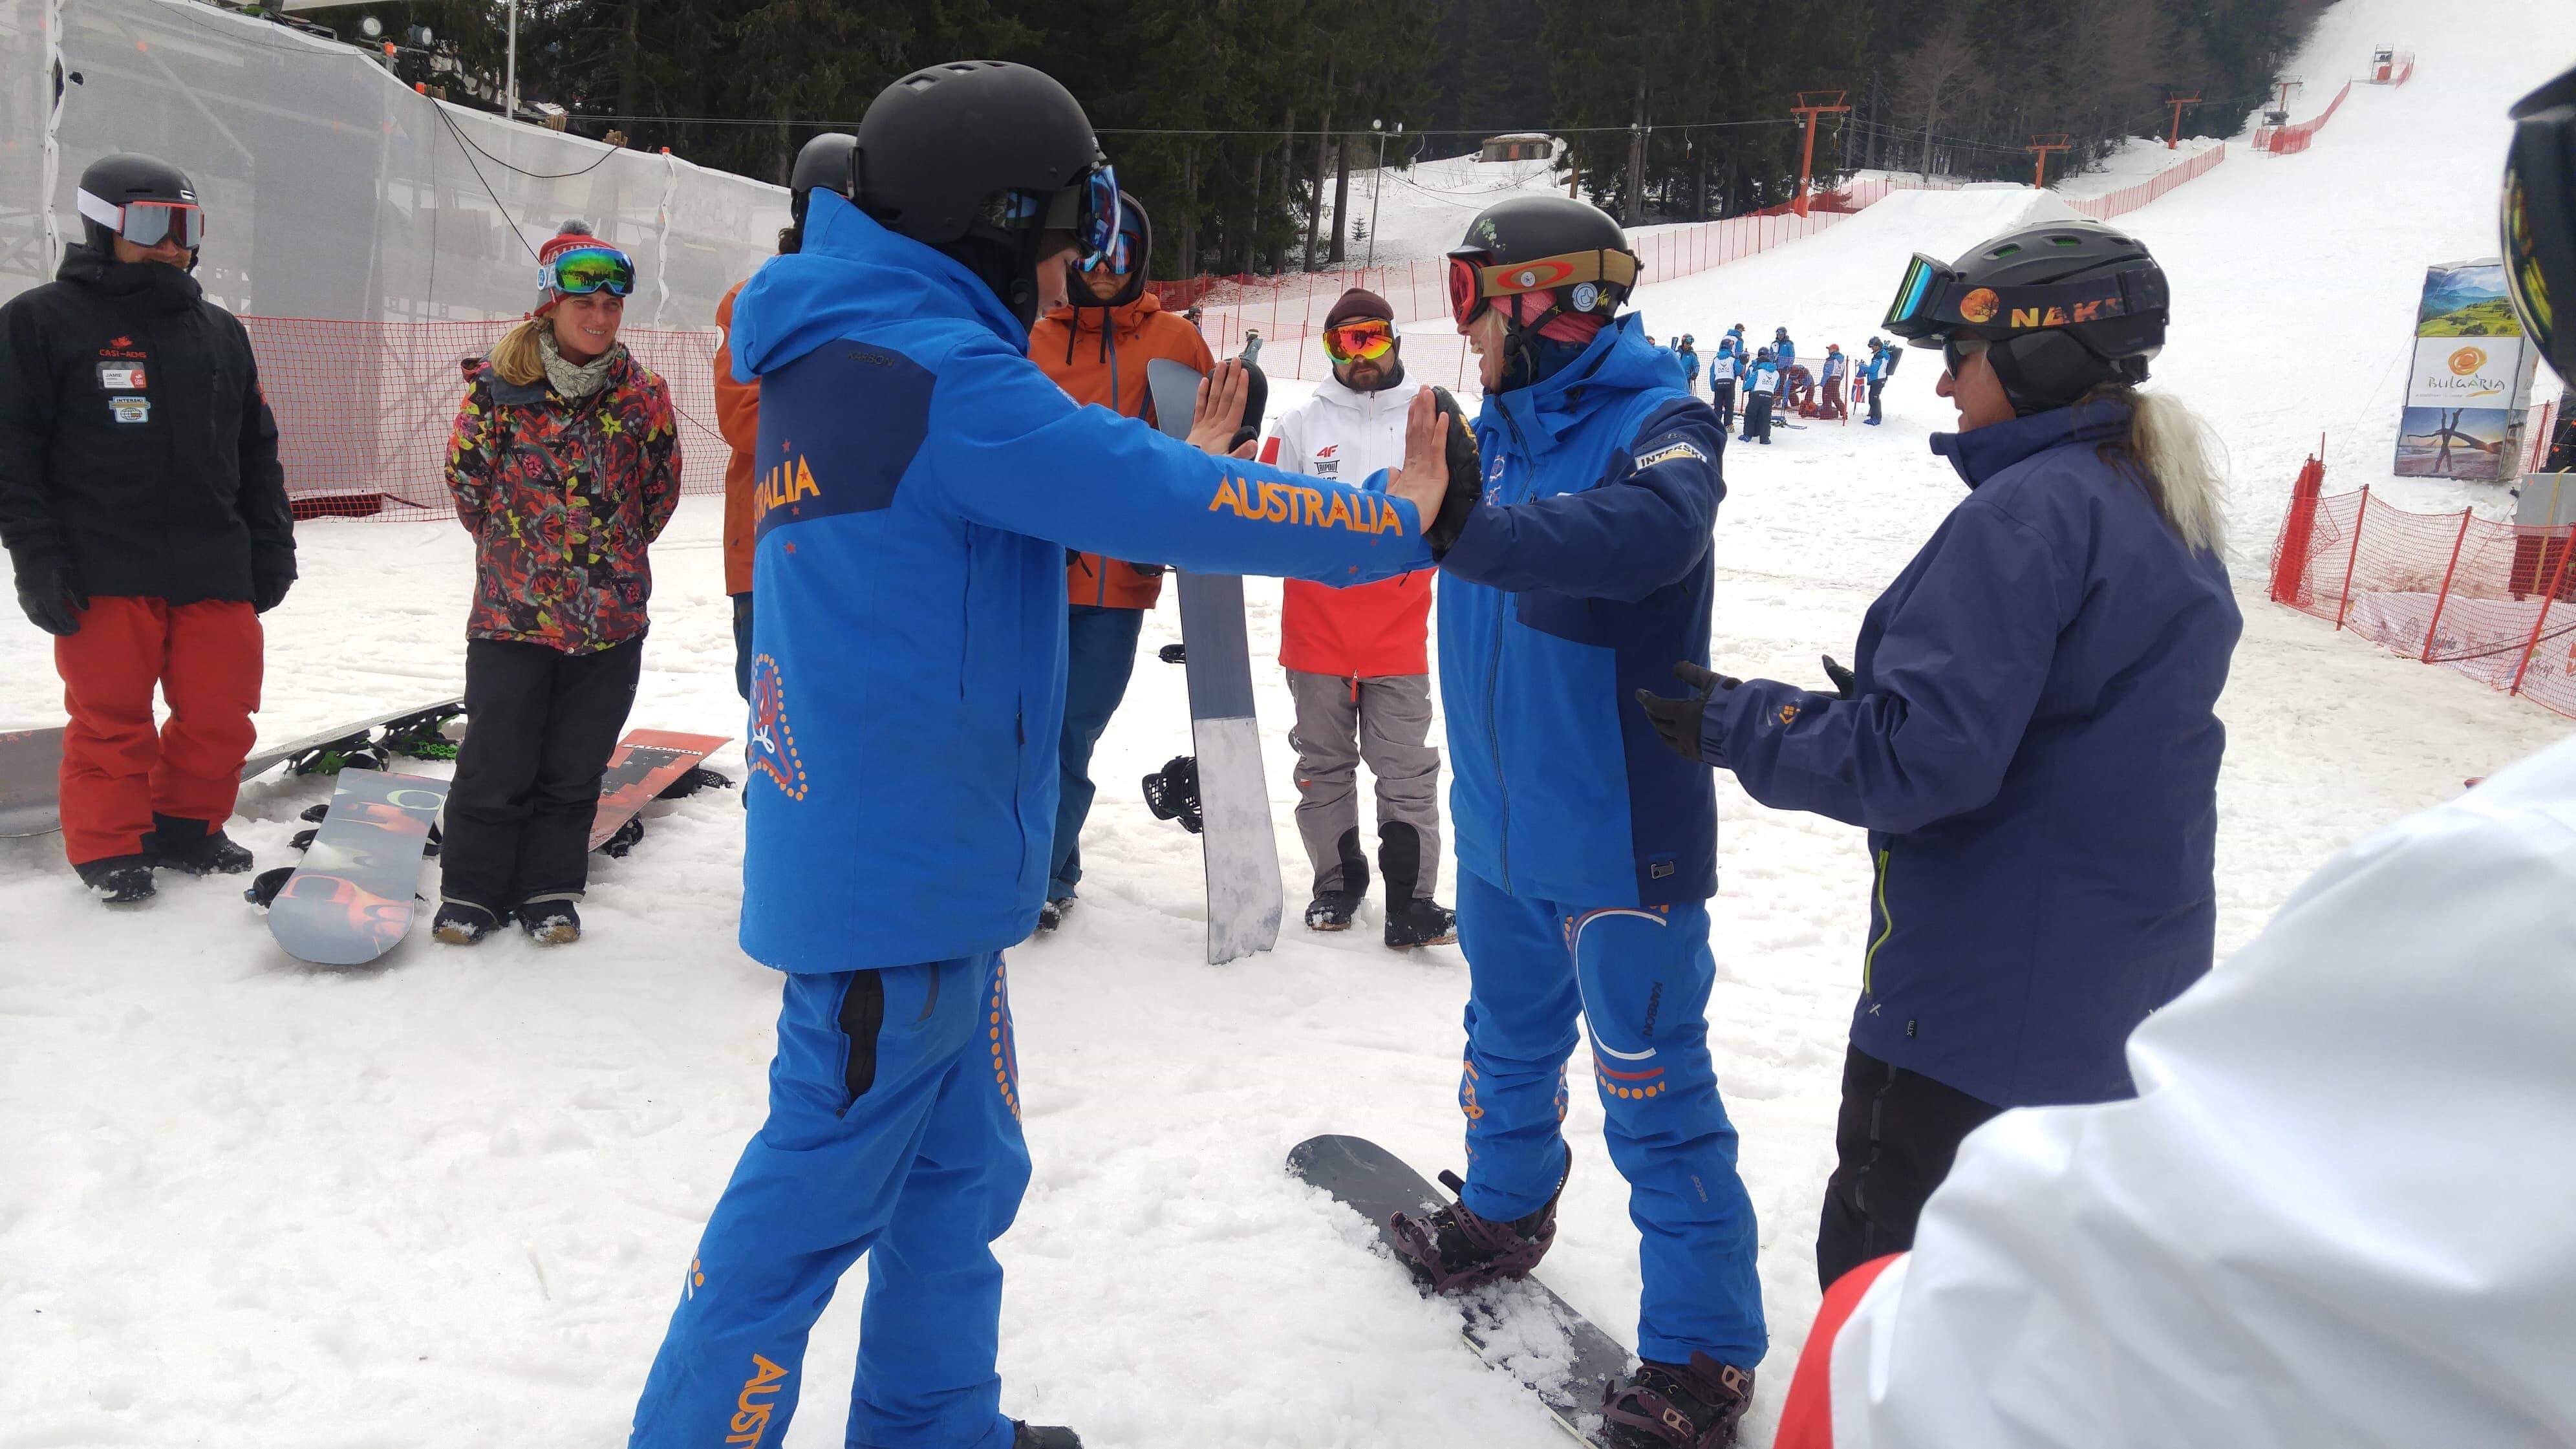
Hi there! Luc, Adam, and myself attended Australian presentation led by Kylie and Adam ( probably the youngest demo team member of whole snowboard crew here)

Even though I work with many Australian certified instructors in my home resort (Whistler Blackcomb) I personally am not really familiar with APSI system. So I was very curious to learn about it.

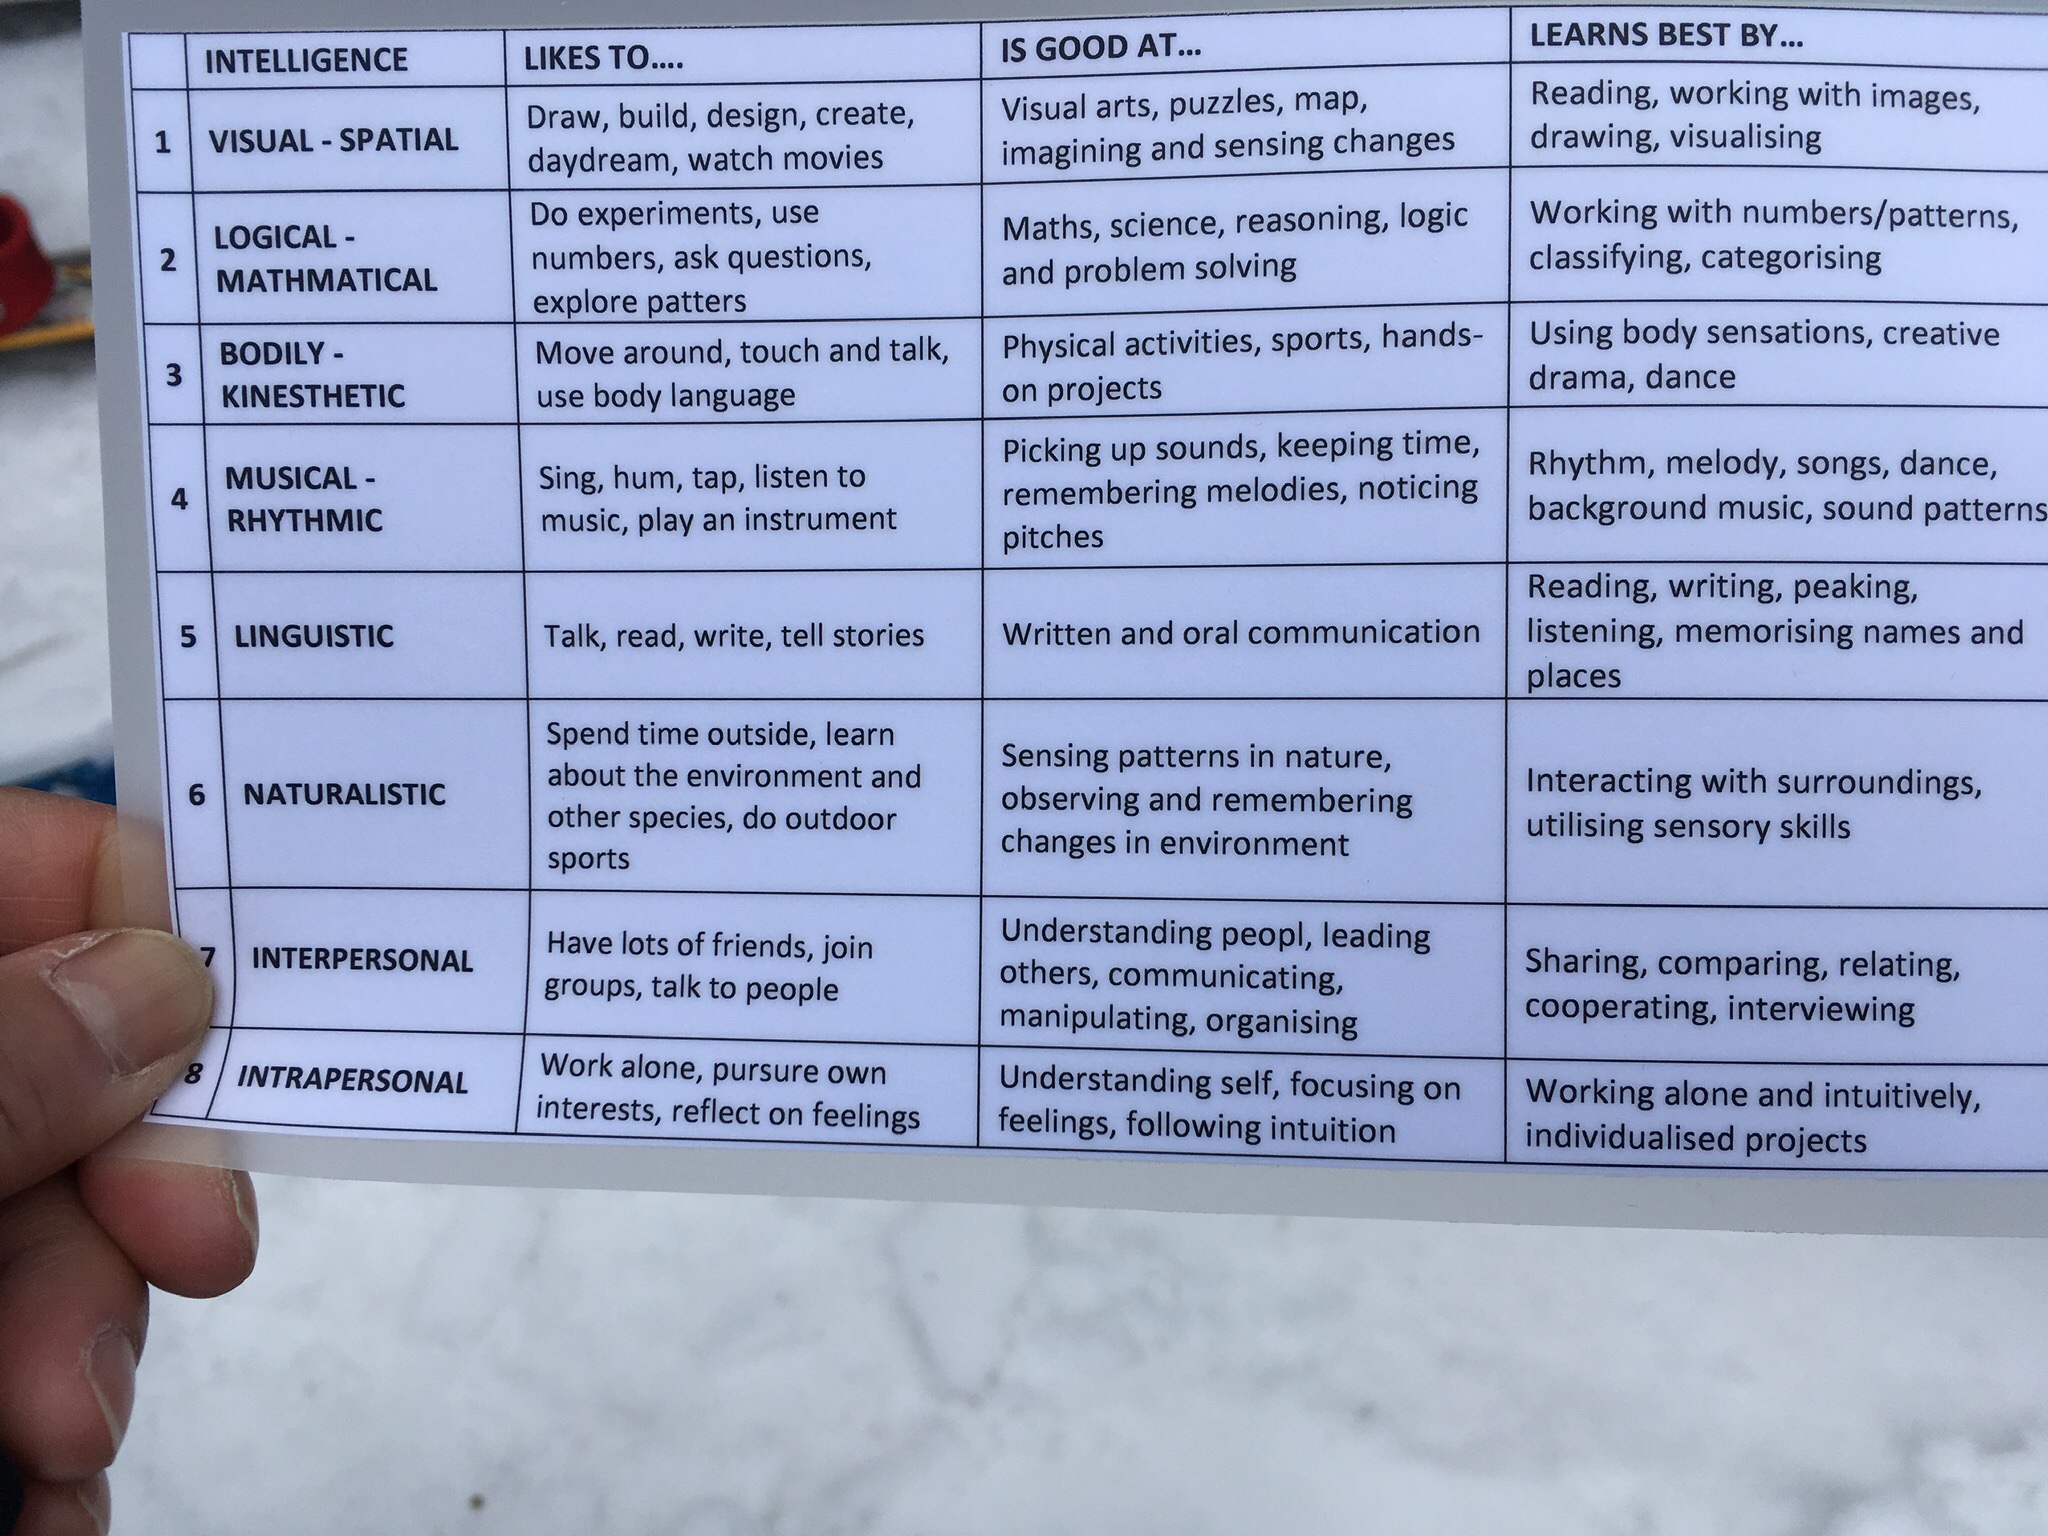
To start with, Adam came down the pitch with long radius turn demo highlighting APSI technique. Kylie who was with the group at the bottom, explained about his body position and edge application to the group. (Establish visual image) I found it this was a pretty good way to present. Especially someone like me who is a visual learner.

Messages here were :

1- Centre of Mass is close to the snowboard.

2-Stable and quiet upper body, all the actions happen with lower body.

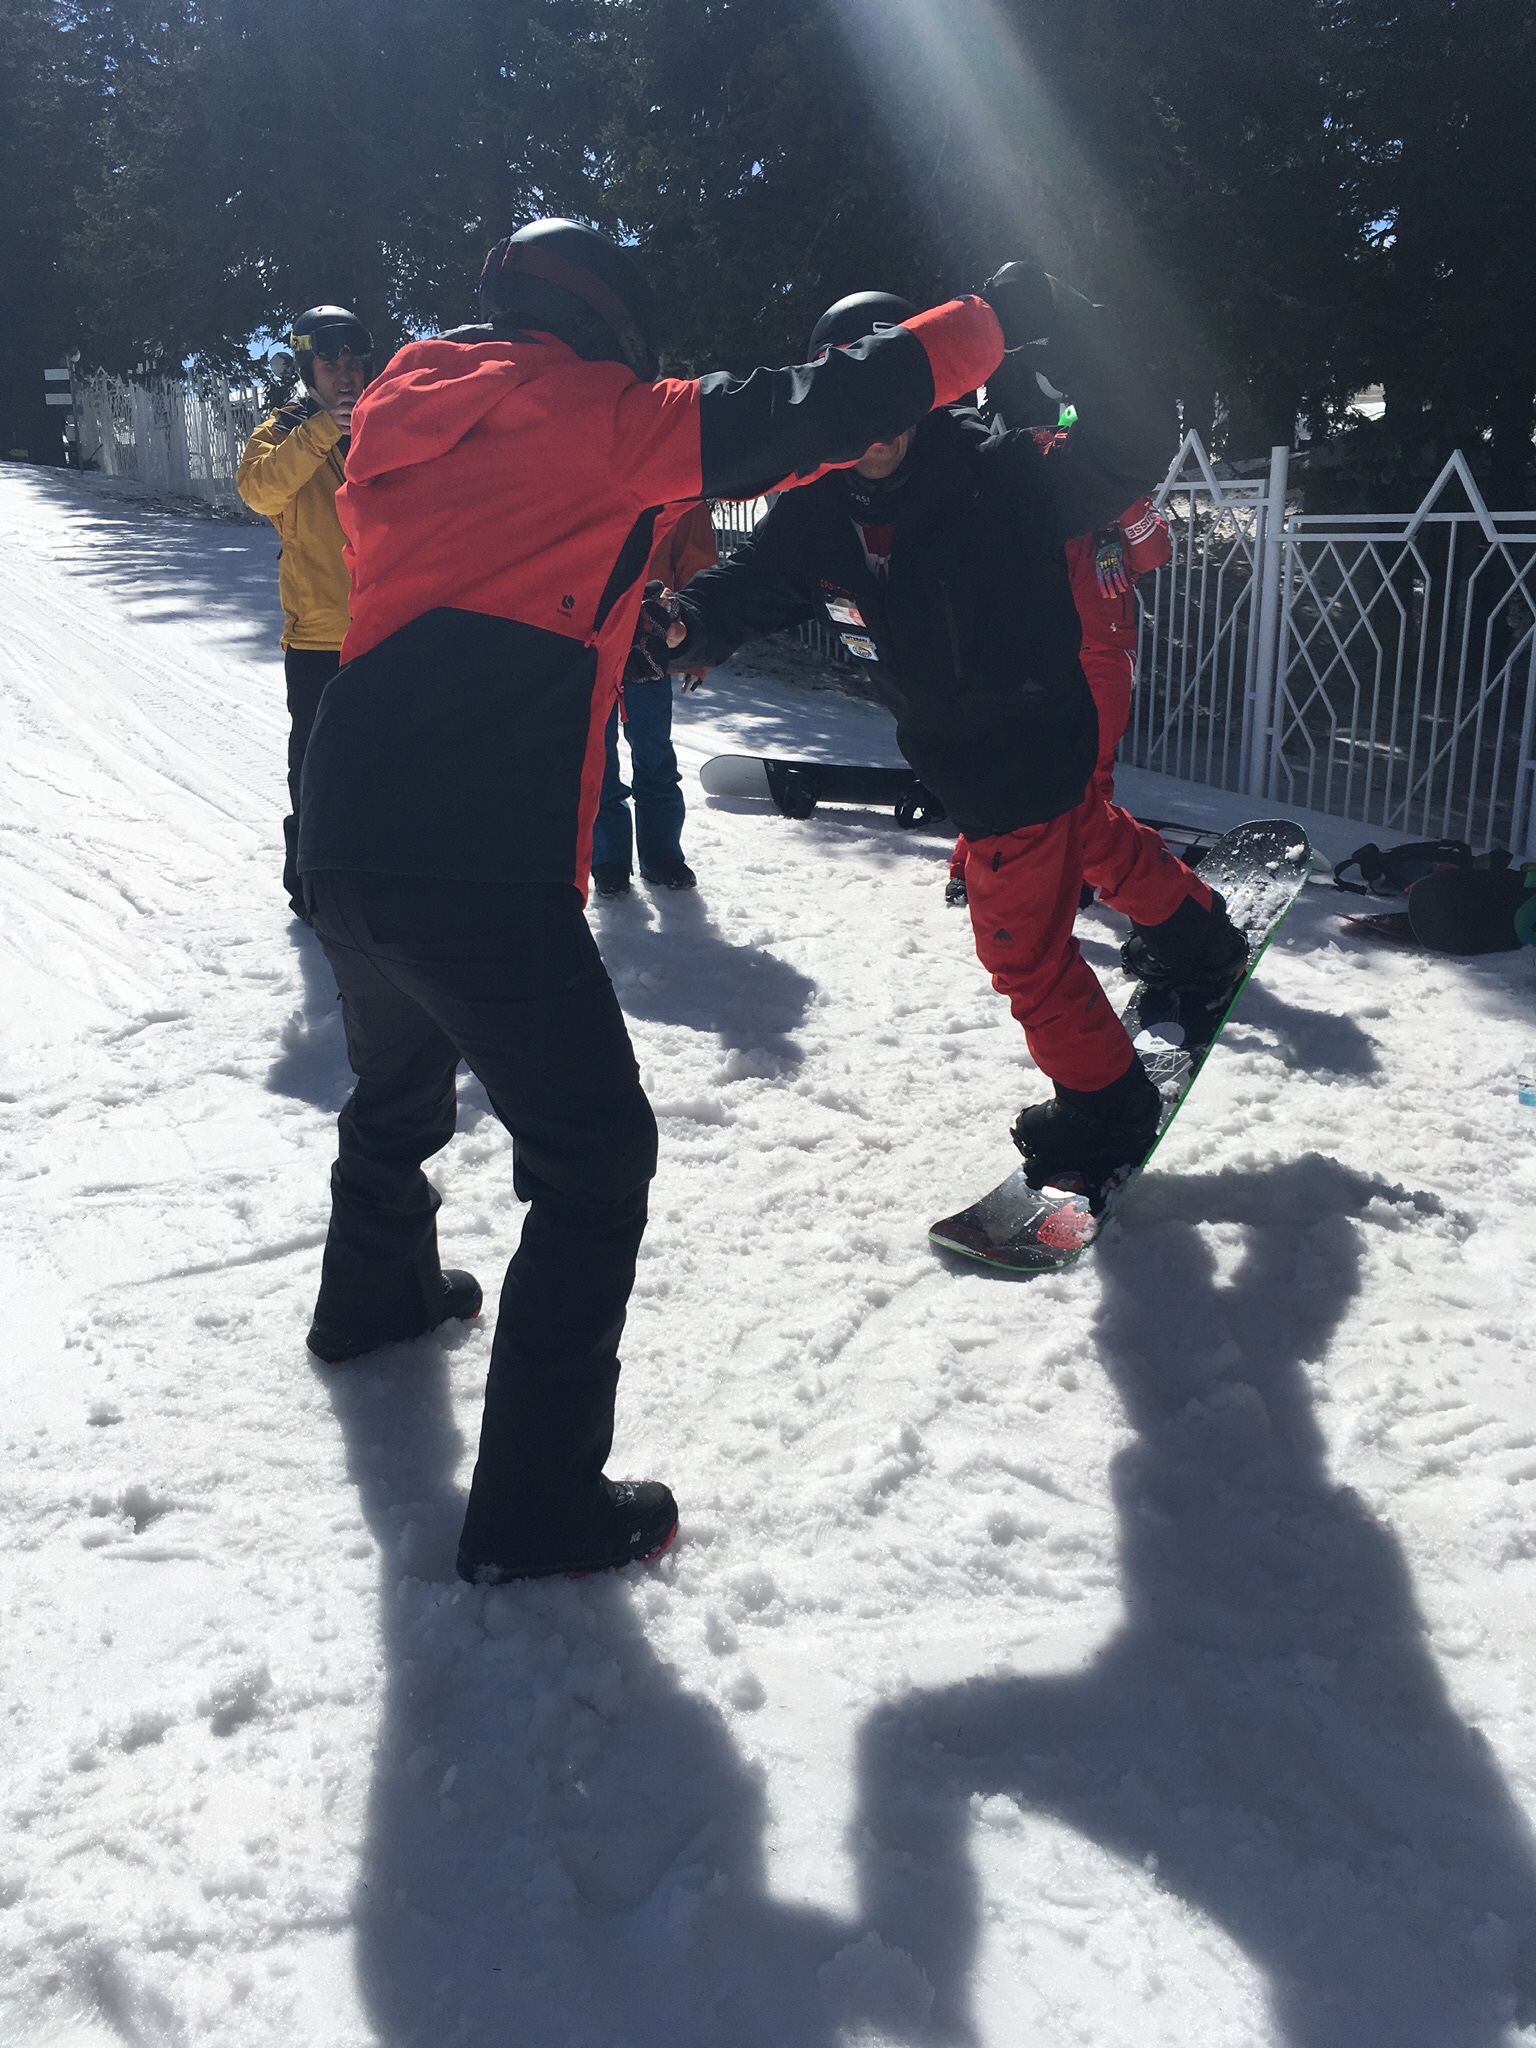
Then we tried the edge engagement at the initiation of the run in APSI way as a static exercise. For toeside, move COM slightly inside to stack the body over the edge (inclination), then use a lot of knee flexion to increase edge angle (angulation). For heelside, again minimum inclination, but creating edge grip by flexing hips joints to start with ( more vertical flexion at hip joints). Key point here is that I felt that APSI uses less inclination than CASI.

Then we tried a few carved uphill turns to feel this movement while moving. Here they emphasized that how they achieve the edge angle : highest edge angle = lowest body position. (This level of edge skill is required for level 1 certification) Again this body position being COM close to the board and quiet upper body is important in order to cope with Australian variable snow conditions especially when it is icy, for them it is not a smart thing to move upper body too far inside and COM away from the board.. that is what they said.

Move on to the one of the exam task of level 2 : Long Turn. Level 1 edge skill was how to feel the grip. Here for level 2 is focus on edge application especially at transition. (They told us to be patient at the top of the turn not rushing to apply edge too soon and not too aggressive) So at the transition phase, run the board fairly flat for the top part of the turn, then increase edge angle and load the board towards the bottom of the turn.

For level 3 level long turns. We experimented three different body parts to have more tension to ride : upper body, core, legs. And we compared which one would be more beneficial to achieve performance for ourselves. Again they explained little bit of the sequence of the movement regarding edge application movement. Release ankle and incline first at the start of the turn them flex at the completion phase of the turn. Still mentioning quiet and passive action at the top of the turn and all the actions happen towards the bottom of the turn. Those actions are, more edge, more pressure application and aggressive vertical flexion. I personally felt by doing that so much pressure built up towards the bottom of the turn and with the slush snow we were riding, It was slowing me down during that phase…

Level 4 they introduced separation of upper and lower body. Definitely more extreme level compared to CASI way of interpretation of upper-lower body separation. For APSI separation is introduced by keeping hips parallel to the snowboard while separating upper and lower body at the waist, upper body turns more towards the direction of travel (more anticipated position) According to APSI, by doing this position, it creates the strong core tension and also this position allows the rider to create dynamic angulation with shoulders, which stabilizes the body position with levelled shoulders to the pitch and perform level 4 standard long turns.

Here, even for level 4 standard, APSI still mentioned that the top of the turn has minimum actions regarding edge angle and pressure, instead, just creating platform that body can stand on, all the actions happen past the fall line.

I understand that every country has different way to interpret when it comes to riding techniques, quite often it is determined by the terrain and snow conditions.

What I learned today from APSI presentation was an interesting interpretation of edge and pressure application based on variable snow condition that Australian mountain has. However I found it was quite different from what we promote in CASI especially when we try to achieve higher level of performance. We CASI definitely use more inclination at the transition, start applying edge grip as well as pressure before the fall line to achieve more dynamic performance.

Thank you for reading this long blog!

Yuki

NZ on snow session : Hard skills vs Soft skills how to bridge the gap (children module)

For New Zealand system, before proceeding to Level 3, it is mandatory to have the children teaching module.

Every level of New Zealand system, there are hard skills (technical riding skills ) and soft skills ( personal skills = human connection). Typically the hard skill is a certain manoeuvre, for example one of the level 1 required hard skill is to perform clear Ollie’s. The soft skills are developed depending on the certification level 1,2,3 or modules (park or children) Understanding both hard and soft skills and incorporating both into lessons are very important.

Adam and I, both of us attended the children’s module.

As hard skills are just the riding skills, which is very simple to grasp the concept, let’s talk more about soft skills specifically applied to children’s module.

Starting with the interview process, we defined the preferred learning styles. ( in New Zealand system, the break down into 8 learning styles : See photo)

Then we determined how to communicate and structure lesson efficiently with children catered to their preferred learning styles (multiple intelligences)

Each of us got assigned role of instructor and student, student got a Q-card about what is their learning style and instructor had to find out student’s learning style through questions.

After identifying learning style of the assigned student, instructors come up with lessons that will work the best for the each type of learners and present them to the assigned students.

Generally speaking, a person’s learning style cannot be the only one, can be combinations of different styles, in that case instructors will adapt lessons plan to cater a few different learning styles. In Today’s session to make it simple we only dealt with one typical learning style.

Thank you for reading

Adam and Yuki

Mastering Swiss “Harry”

Yesterday Switzerland presented indoor lecture with the topic of “Stop thinking, Start learning” This topic was based on Swiss methodology of skill development. Presentation was done by Isa, she is in charge of educational committee on Swiss Snow School Snowboard division. Similar to CASI, they emphasize on delivering lesson customized to customer’s needs in order to give the best learning experience. For instructors, they develop several points and tools to structure high quality and fun lessons in the simplest way possible.

Three models are introduced:

1st level – Acquisition/ Consolidation

2nd level – Application/ Variation

3rd level – Creation/ Supplementation

We also discussed in groups to list some key points to simplify lessons, such as small steps, good demo, analogy, simple and clear explanation etc.

Today’s on snow presentation was based on indoor presentation. Breen and I were in the group of Philipp, a technical director from Davos snow school.

At the start of the presentation, Philipp mentioned two goals:

1: Learn to do trick called “Harry” ( nose press with backside shifty)

2: Introducing Swiss methodology of skill development.

The first goal is a technical goal and the second goal is a pedagogical goal.

Philipp started just showing clear demo and made us try with mileage. At this stage his intention was to make us learn basic form of this trick “harry” just by copying his demo. Then at the top of the lift on the flat area, he made us do static “harry” without board first, then with board assisted by someone. Then we went down to apply this moment on the easy terrain to start, kept practicing with mileage. This first step is Acquisition and consolidation.

Next, Philipp added three analogies to help us perform “harry ” better.

1: Superman – lean forward to the direction of the travel

2: Kick boxer – back foot heel kick movement

3: Frisbee throw (with front hand) – helping body to move forward

Also he added another hint, making us feel pressure on big toe on front foot, pressure on heel on back foot.

This second step is Application and Variation

Lastly he paired us up and perform “harry” following each other. This gave us an opportunity to copy each other’s movement and learn the timing of performing “harry”. After this we headed to terrain park to try “harry” on the rollers of the jumps. This allowed us to adapt timing with more speed and perform more stylish “harry” . He also gave us last hint which is the extension of hip, knee and ankle joints when performing “harry”

This third step is Creation and Supplementation.

Overall it was a fun session, well-prepared, maximized terrain available. We were challenged, moving, cheering, laughing, falling. It is always interesting to see the different approaches to similar materials we use in the CASI system. Philipp was focusing on presenting clear structures of the Swiss methodology of skill development and it was definitely clearly delivered. I wished we had more group or personalized feedbacks to achieve our technical goal more efficiently, even if we were using guided discovery approach.

It is always fun to learn new things!

By the way we decided to name #swissharry for this trick. Don’t forget to use this in your photos!

Yuki

Demo night

What an amazing experience !! Tonight all three Canadian sliders were on the demo slope. CSIA, CANSI and us CASI team, all three teams did the great demonstration.

It was a long day starting on snow shredding with other nation’s snowboarders then attended the workshops on snow, lunch, training on spring boots deep slush on demo slope on the mountain. Then attending another two indoor workshops, 20min dinner got on bus then to demo slope!!

Being the lightest and smallest rider of the team, I needed to have speed so I managed to sneak in a time to quickly wax my board between that busy schedule.

Before the demo, all three Canadian team got together in circle, and team coach of CSIA cheered us up. True team spirit was there.

On demo slope we did two runs, two formations we practiced. As the daytime temperature was so hot, and it was a night show, of course it froze up, very firm snow for the snowboarders. But it was definitely advantage to hit jump as during the day time the approach speed was bit slow.

Led by Adam on the first run. We dropped in right after CSIA team, being the 2nd last rider in the formation, I needed to keep my speed to follow exactly behind the riders in front of me, and right behind me, there was Luc following right on my tail of my snowboard, (I could hear his edge noise) with Go-pro on his helmet.

Towards the bottom of the run, there was a jump set up and of course we all hit the jump. Actually I never told my team mates, but it was my very first time to hit table top at night, I was bit nervous but I trust my teammates, all I need to do is just follow their lines and take off! And I did it! Oldest lady in the demo team can still fly!!

2nd run was another formation. This time I was leading Breen and Luc. Original plan was fast shorts turns, but as soon as I dropped in, I realized that snow was really icy, so in order to keep the steady rhythm, instantly I modified the turn size, slightly larger than our practice so the following riders can match easily (they do have longer board than me)

Toughest part being the front is, I needed to keep the pace and rhythm consistently so the other two riders can match easily. It is easy when the snow condition is good, not on icy steep demo pitch for sure.

It was a great accomplishment for the team, for myself. We are great teammates together. They pushed me to hit the jump and I was so happy that I did it.

Synchro riding may not be the type of riding we do normally but definitely this requires and highlights the true technique in snowboarding. This was a challenge to be adaptable, modifying my usual riding habits, and be consistent.

Yes we did it! And we did it very well!! We showed that Canadians can shred hard!

Thanks for this great opportunity.

Yuki